
eOriginal Vaulting for PDFs
Configuration and Setup
-
Create TOD and OnDemand eOriginal eVaults
Customers of Proof who wish to use eOriginal as their vault provider must contact eOriginal sales directly and sign their own contract with them, at which point they will be a “mutual customer”.
eOriginal is responsible for vault setup, but they’ll need to know that you need:
● A “Test-On-Demand” (TOD) vault
● An “On-Demand” (Production) vault
Ask eOriginal to use the template settings for a “Notarize” vault. -
Ensure Both Vaults Have Appropriate Status Values
a. Login to eOriginal.
b. Click "Preferences" in the upper-right toolbar.
c. Click "Vault Administration" heading on the left hand side.
d. Click "Status Values"
e. Ensure there is at least the following Status Values:
f. “Authoritative Copy” with scope “Document”.
g. “Created” with scope “Transaction” -
Create Notarize API User in eOriginal and Retrieve the API Key
Navigate to Preferences. On the left-hand side, select API Users under Vault Administration.
Create an API User with the following settings:
● API Login ID - notarize-integration
● Application - Notarize
● Purpose - Vaulted PDF Integration
● Email - [email protected]
● Permissions - “Create Document Profile”, “Create Transaction”, “Full Org Search”, “Get Org Configuration”, “Throw Custom Event”.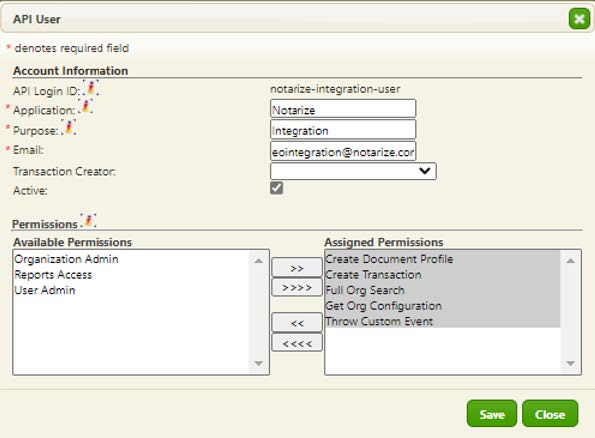
Upon creation of the API User, the API Key will be displayed in a subsequent pop-up:
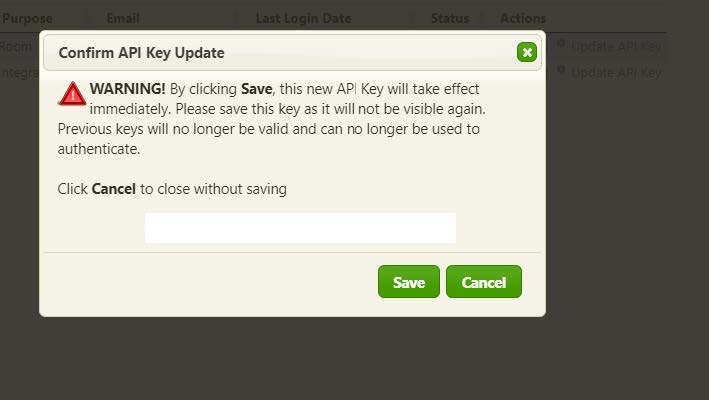
Copy this down for use in step 7. If you accidentally click “Save” and forget to copy it down, you can retrieve a new key by clicking “Update API Key”.
-
Give the Notarize API User Appropriate Container Permissions
We recommend every available permission, but you will need at least
● “Authorize Document Destruction”
● “Cancel Document Destruction”
● “Create New Version”
● “Delete Document Profile”
● “Delete Transaction”
● “Edit Transaction/Document Properties”
● “Reject Document Destruction”
● “Request Document Destruction”
● “Retrieve Document”
● “View Document Activity History Report”
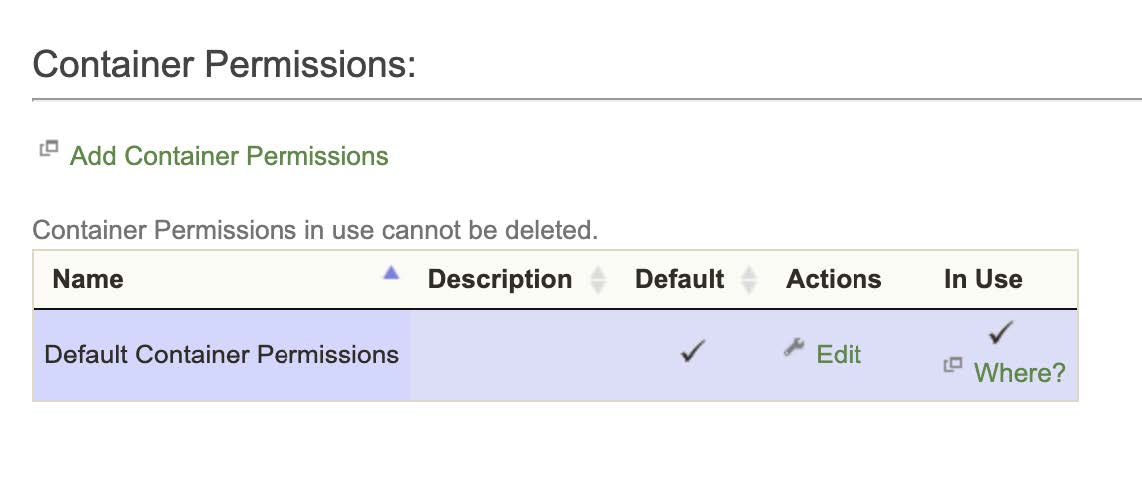
● “View Transaction/Document Properties”The best way to ensure this is to give the API user default container permissions.
Navigate to Preferences.On the left-hand side, select Container Permissions under Vault Administration.
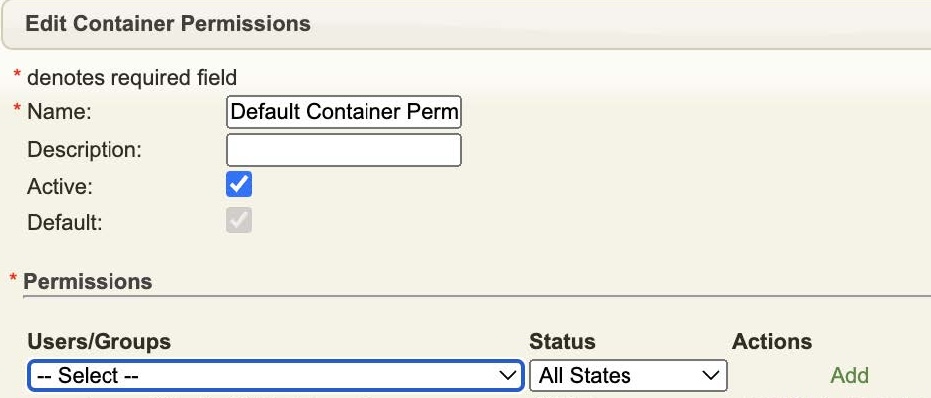
Under Default Container Permissions, click Edit under the Actions column.
Under Users/Groups, find your API user in the dropdown menu. If you followed step 3 exactly, it should be called “Notarize Vaulted PDF Integration”.
Ensure “All States” is assigned as the Status, and click Add.
-
Create a New “Notarize Document” Document Type
Create a document type with identical name and settings as the screenshot below: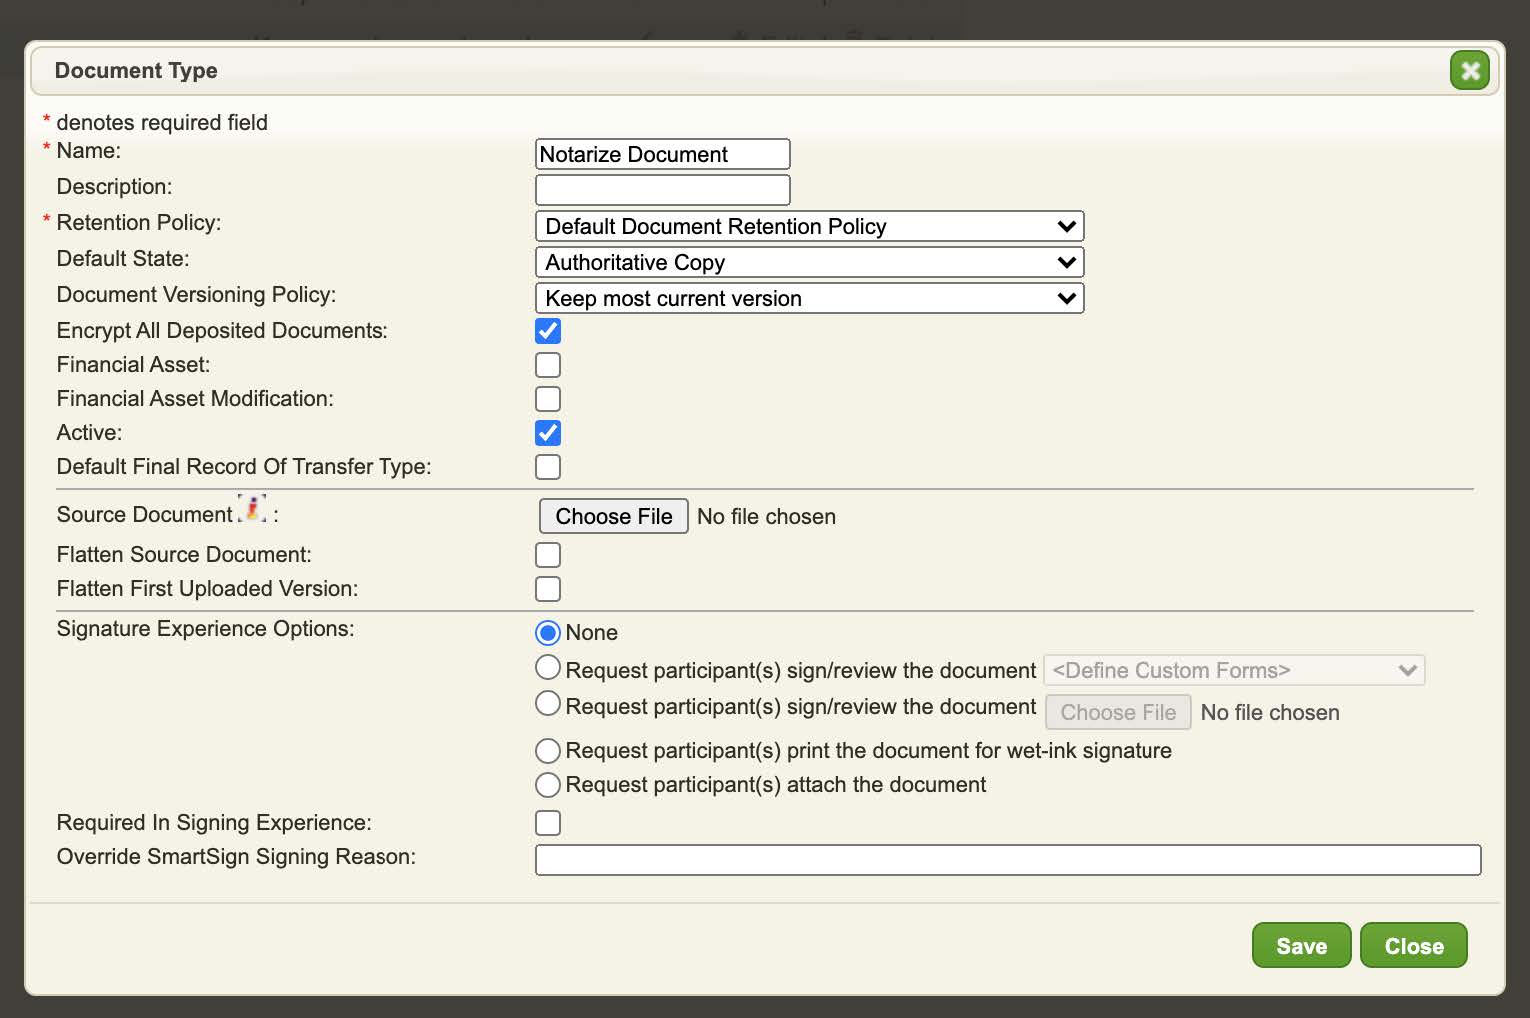
-
Create a New “Notarize Transaction” Transaction Type
Create a transaction type with identical name and settings as the screenshot below: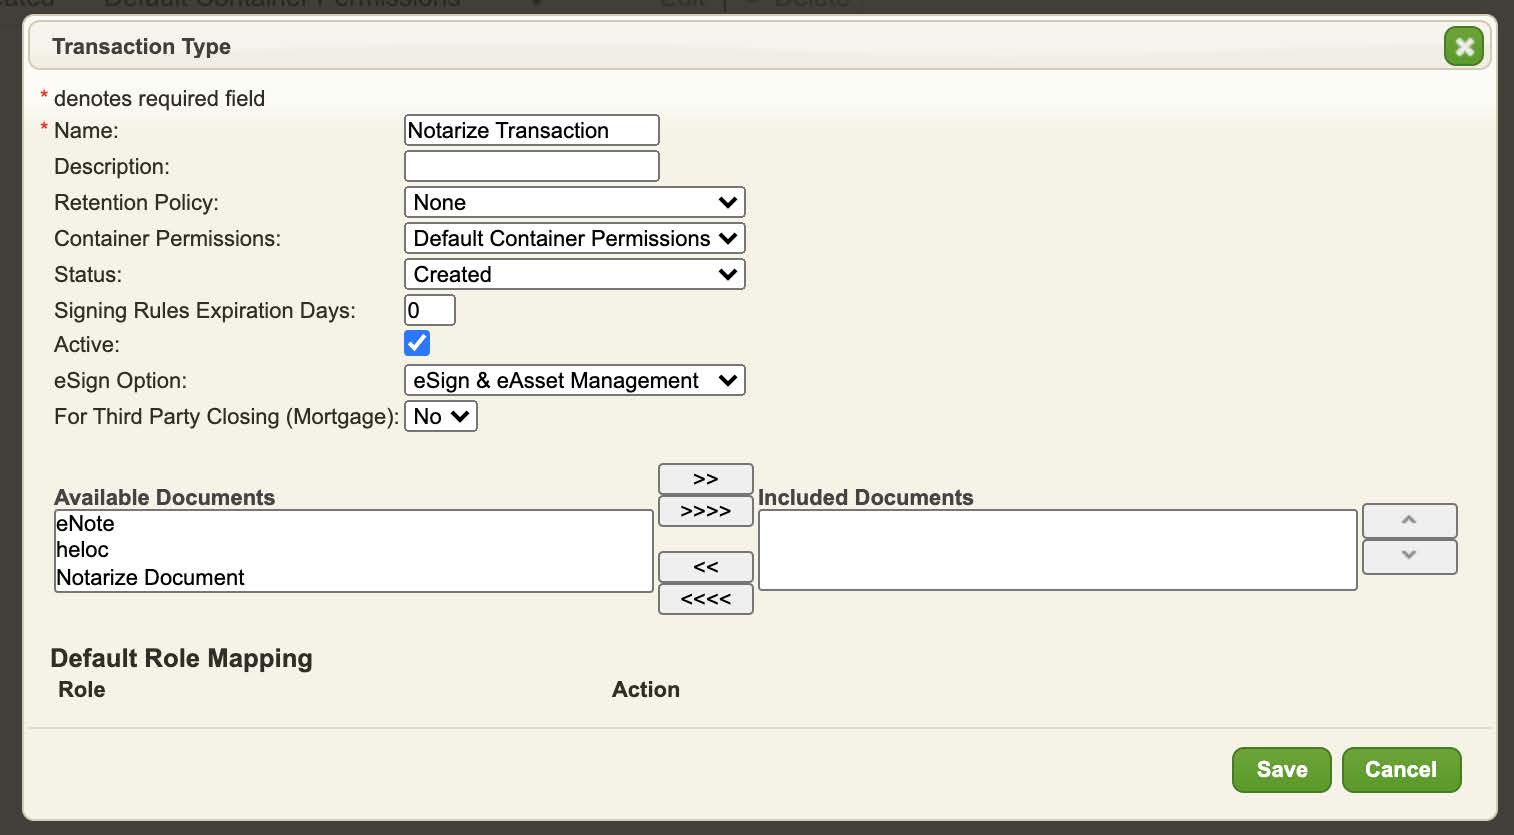
-
Send Your Credentials to Your Proof Solutions Engineer
Your Proof SE will need to enter your API user credentials on the Proof Admin side for you to begin testing. Provide them with the following information from both your TOD and OnDemand vaults:
● API Login ID
● API Key
● Organization Short Name*
-
You can find the “Short Name” in your eOriginal account at Preferences >> Organization Administration >> Organization Configuration (“NotarizeLenderA” in this case):

-
Create a Proof Transaction with Vaulted Documents
Once your eOriginal credentials are entered on the Proof side, you can tell Proof to store a document in your eVault–both via the Business UI as well as the API.Proof Business UI:
In the transaction creation screen, select the left-most option under “Select to set requirements”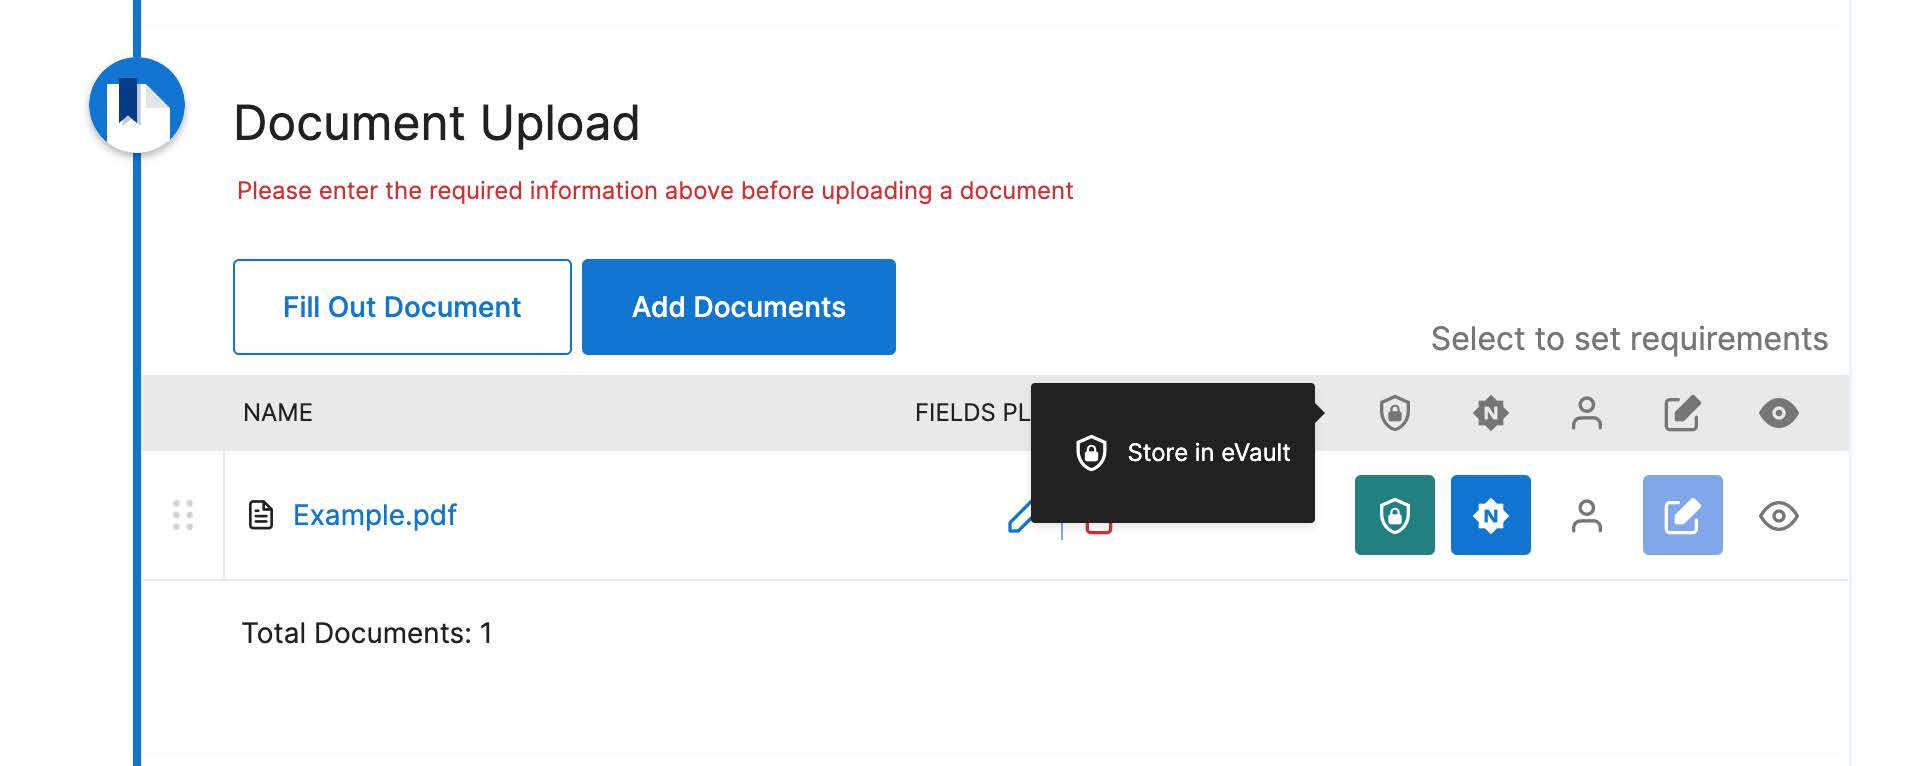
API:
When calling the Add Document endpoint, you can tell Proof to store a document in your eVault by including “vaulted”: “true” in the request payload:
{
"resource": "<https://static.notarize.com/Example.pdf">,
"vaulted": "true"
}-
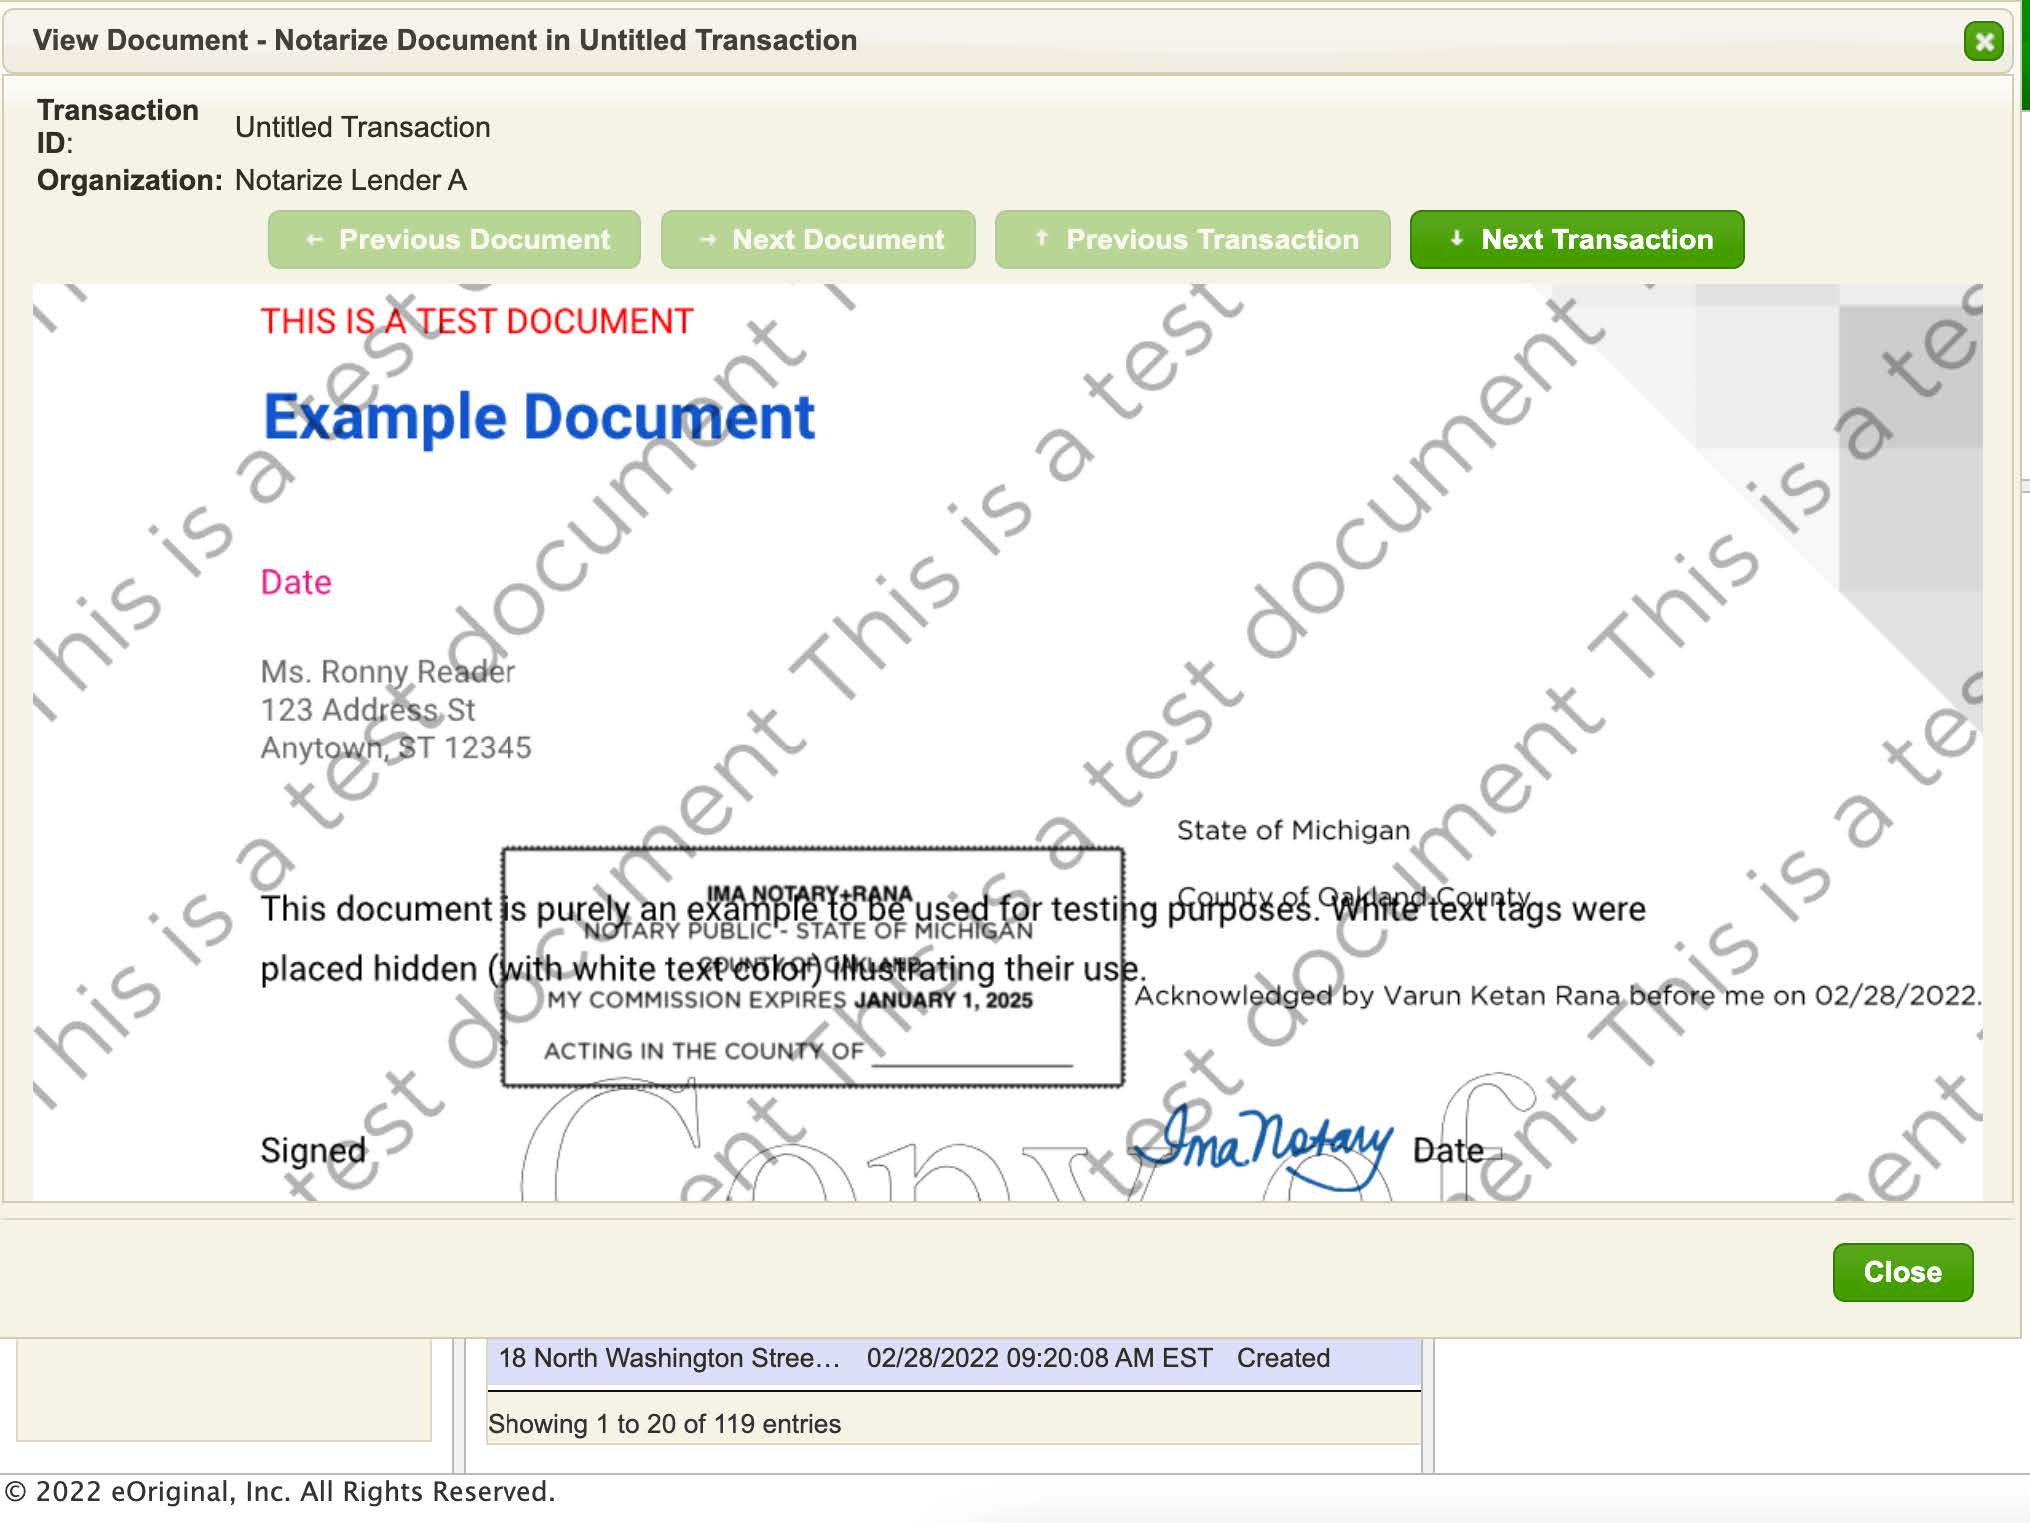
Access Documents in eVault
In your eOriginal account, go to Workspace and search for your recent transaction. If you use the transaction_name parameter when creating the transaction, it will appear as the “Container ID” - otherwise it will be listed as “Untitled Transaction”.Click on the transaction and the details will show on the right-hand side:
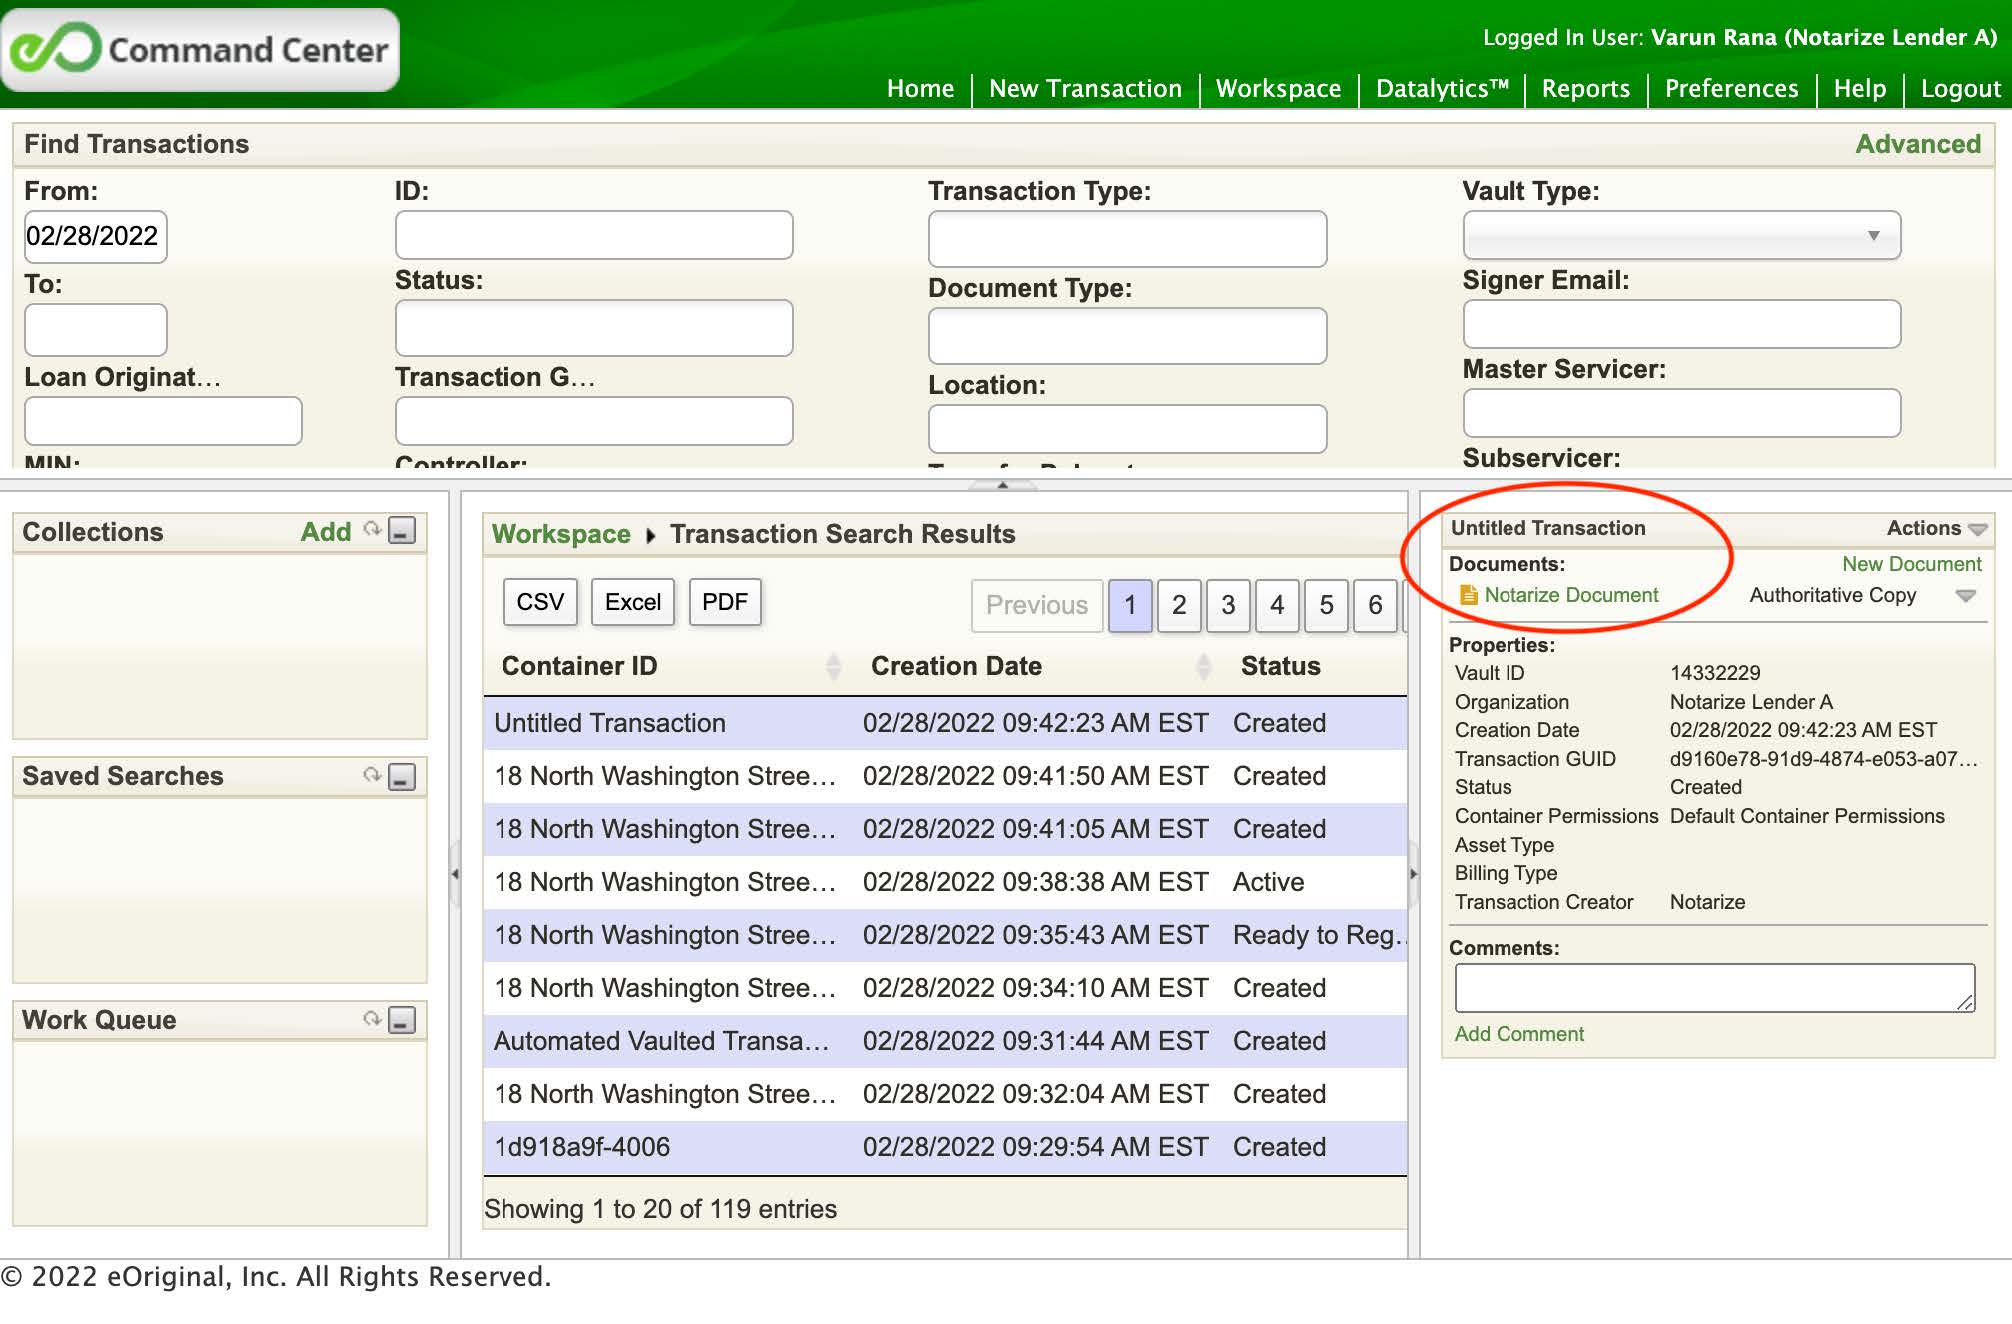
Click “Notarize Document” and the document will be shown on the screen:
Updated 10 months ago