Document Templates
(Business only)
Manually applying tags to documents can become a repetitive task for your team, especially when it's the same exact blank document every single time. Document templates save your team redundant manual work by letting you prepare pre-tagged templates in your Proof account that you can reference at transaction creation, both via the UI and via API. This is a great option if your document template does not contain any PII pre-populated on the document.
If your documents come pre-filled with signer information, or if your team would prefer to manage document templates outside the Proof ecosystem, Document Templates are not reccommended on their own. You should prepare templates with blank versions of your document and enabled automated template matching or explore another templating solution. Read more about about Proof's other automated tagging options that may be more suitable for your needs.
Check out our Tourial demo on creating a template! (no account required)
Creating a Document Template
In the Send + manage tab of your Proof Business account, on the left-hand side, navigate to Tools >> Document templates, and click New Template. Then upload your PDF.
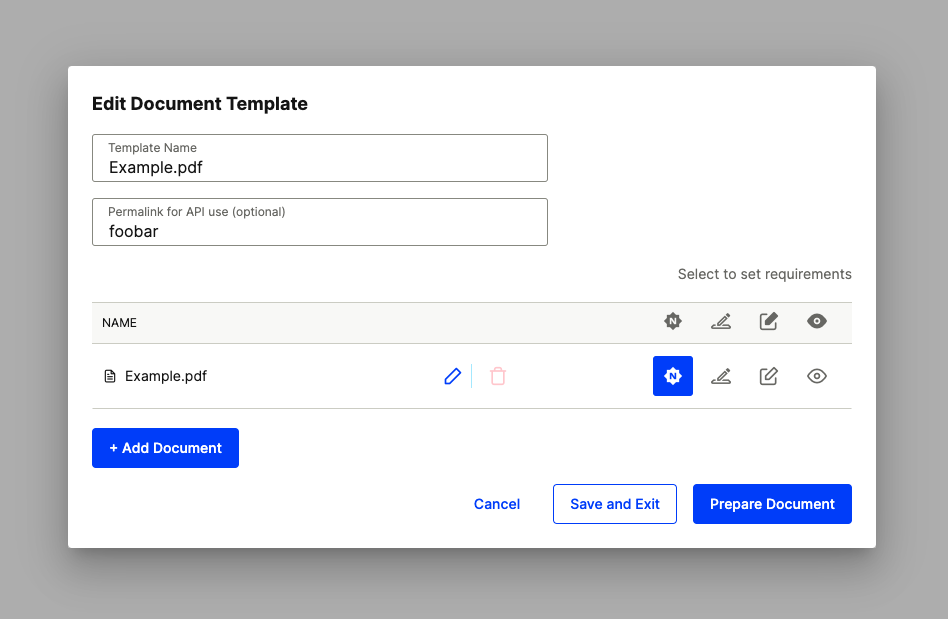
Proceed with naming your template. Here you'll have the option to designate a permalink, i.e. a shorthand for your template that you can reference via API (all lowercase, no spaces). Additionally, select the signing requirements via the icons on the right.

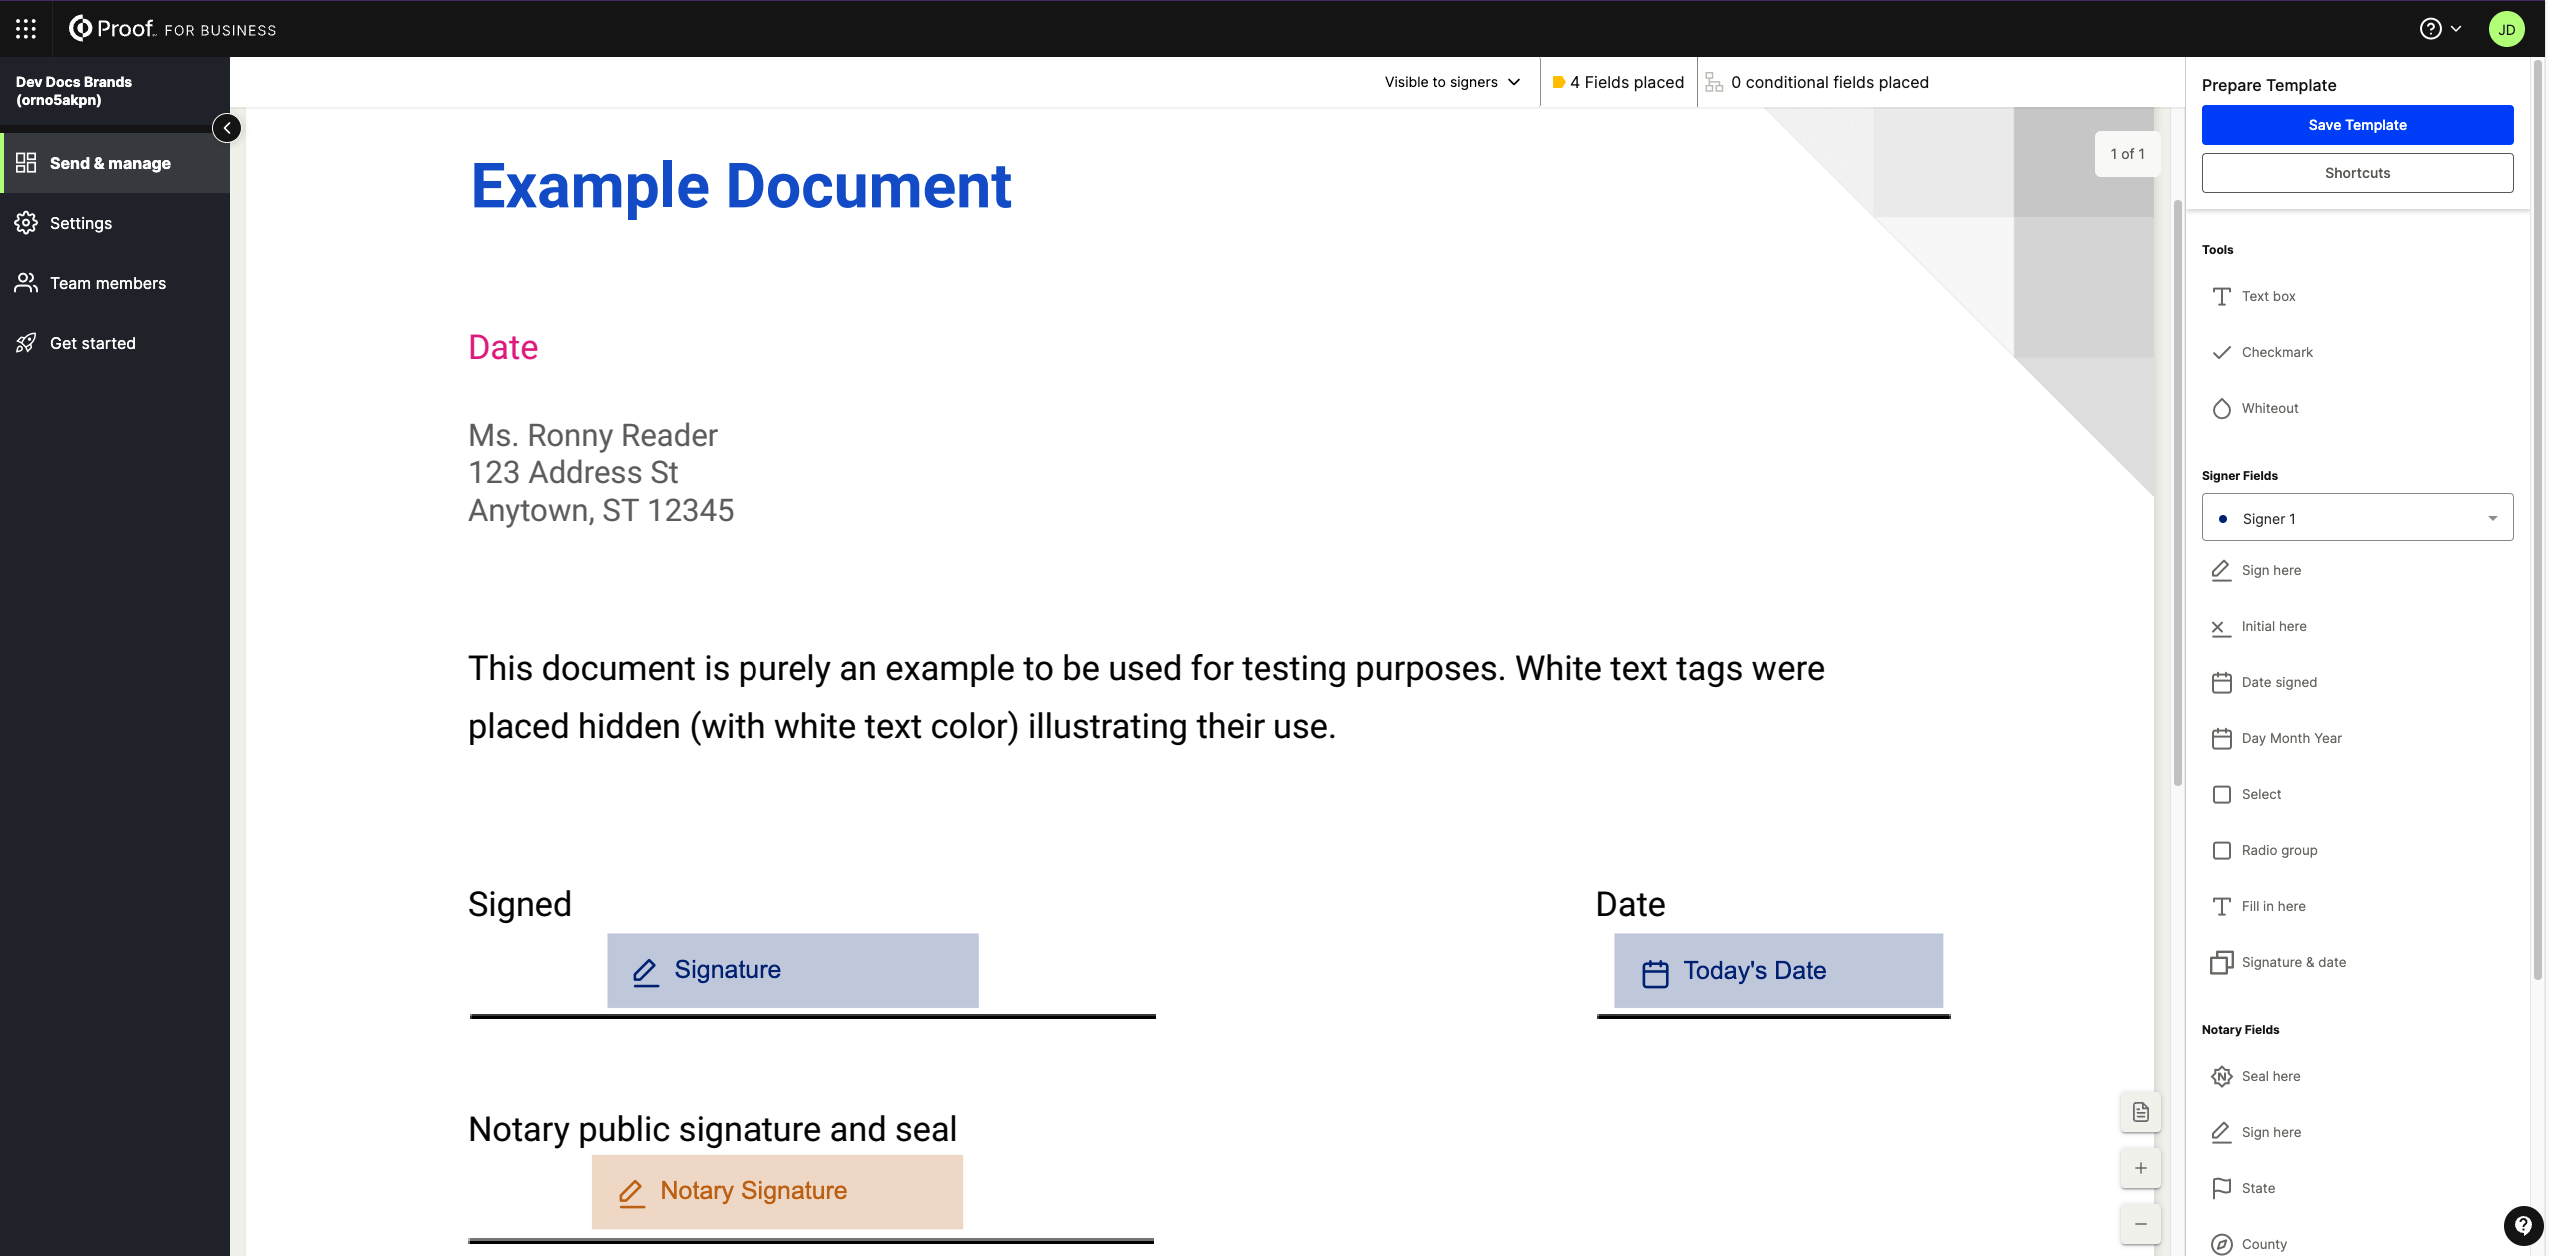
Finally, drag-and-drop tags on your document from the right-hand side, and click Save Template to save your changes.

Referencing a Document Template
UI
During manual transaction creation, on the left-hand side of the document upload pop-up, click Template upload and select your template from the list. If needed, you can make changes to your tags on the following screen.
API
When creating a transaction or adding a document, simply populate the resource parameter with the template permalink you specified at the time of template creation:
{
    "resource": "templatename"
}
Field Instructions
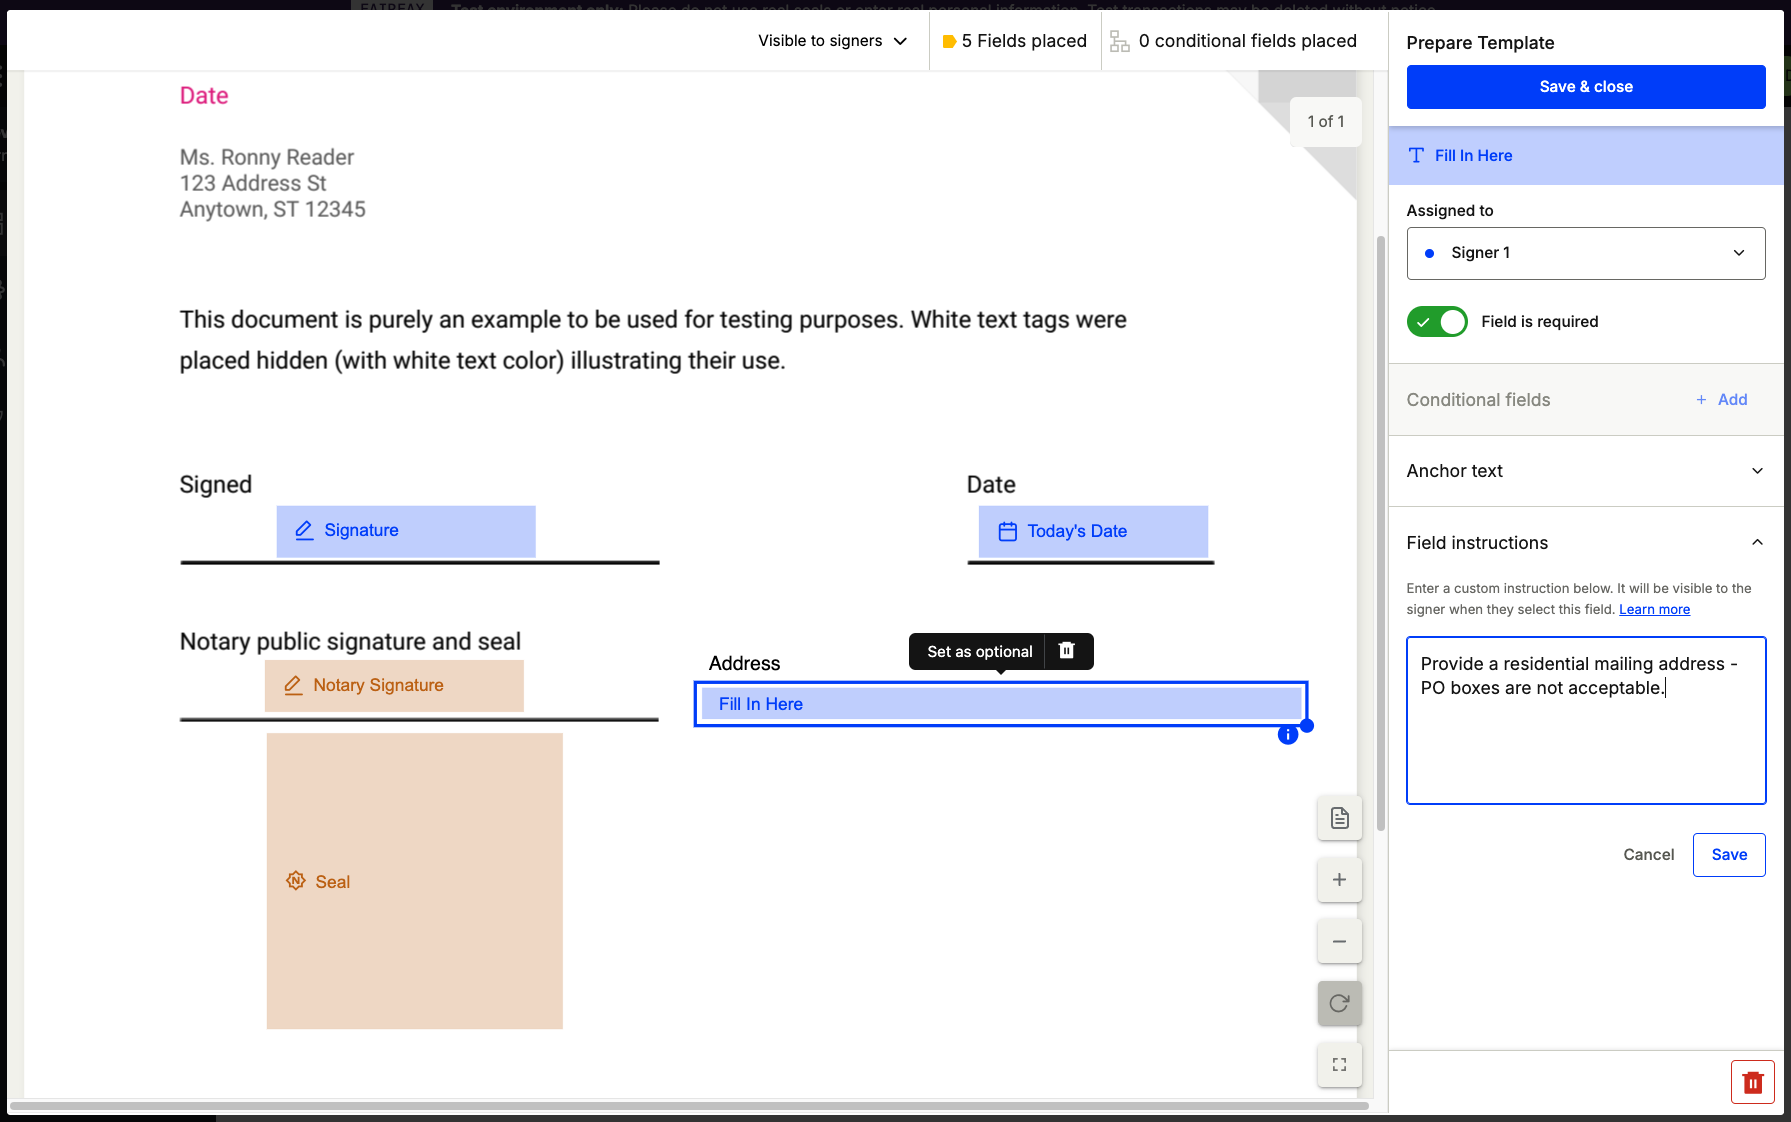
Add a designation by clicking on the sidebar to select the desired field type and clicking on the document to place it. You may then select the designation and add a field instruction through the panel on the right. Save the instructions using the Save button.

When the assigned user hovers over the designation in the Proof signing experience, they will see a tooltip containing the text assigned in the instruction. Signers will only see signer instructions while notaries are able to see both notary and signer instructions. There is a 500 character limit on field instructions and only fields resulting in some text annotation are supported (e.g. checkboxes/radio buttons do not support field instructions).
Updated 5 months ago